A clean workspace is a great way to boost the reputation of your business. It will also keep your employees happier and healthier.
Some commercial locations require specific cleaning solutions or exacting standards. Examples include food processing plants and medical offices. For professional help, contact Commercial Cleaning Services Maryland.
Commercial cleaners specialize in working in different types of premises. Their jobs may involve trash removal, sanitization of doorknobs and light switches, and cleaning kitchens and break rooms.
A clean and tidy commercial space reflects professionalism and attention to detail. This impression translates into customer loyalty and brand recognition. It also helps increase employee productivity and morale. It is impossible for your employees to do their best work when they are distracted by a dirty and disorganized workspace. A professional cleaning service will handle all the messy tasks, allowing your team members to focus on their job-related tasks.
Commercial cleaners, often referred to as custodians or janitors, clean a wide variety of businesses and establishments, including office buildings, schools, restaurants, hotels, retail stores, and healthcare facilities. They are trained to clean quickly and thoroughly, and they use sophisticated cleaning equipment that is not suitable for home use. They also offer specialized services for specific industries and needs, such as industrial cleaning and post-construction cleanup.
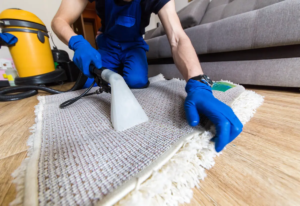
Regular commercial cleaning includes sweeping and mopping floors, vacuuming carpets, emptying trash cans, sanitizing restrooms, and wiping surfaces. Some services also include polishing of furniture, deep cleaning of carpet and textile coverings, and washing windows. Additionally, some companies provide specialized services for different flooring types, including stripping and waxing vinyl and linoleum, buffing and burnishing tile and concrete, and cleaning hardwood and other porous surfaces.
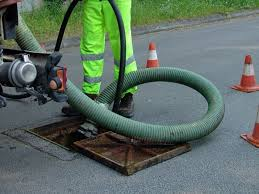
Specialized commercial cleaning services also focus on the safety of customers and employees. They sanitize doorknobs, light switches, and shared equipment to reduce germs and bacteria. They also disinfect shared areas like break rooms and kitchens to ensure a healthy environment. In addition, they perform special tasks like garbage removal, dumping and scrubbing dumpsters, and removing graffiti.
Unlike some commercial cleaning services, which outsource their work to contractors, Slate employs all of its cleaners. This ensures that each cleaner receives comprehensive training, management, and legal protections. This approach reduces staff turnover and enhances quality control. It also reduces costs and increases productivity.
A clean work environment increases productivity, boosts employee morale, and creates a positive first impression on customers. However, it is not easy to maintain a clean workplace. It takes time and effort to keep a business looking neat, organized, and professional. A cleaning service will save you time and money by handling the task of maintaining a clean workplace.
Flexibility
Commercial cleaning services are different from residential cleaners, in that they work in business and manufacturing settings. They deal with a variety of cleaning situations that would not be encountered in the average home, and they are often highly qualified in different cleaning standards and methods. They also know the types of equipment and materials needed to perform the specific cleaning jobs.
In addition to basic office cleaning, commercial cleaners can offer a variety of additional services to keep the client’s business in good condition. They can empty trash bins on a regular basis, clean windows, and sanitize restrooms and breakrooms. They can also provide paper products and soap for use in these areas. In addition, some companies offer special services such as graffiti removal and gutter cleaning.
A good commercial cleaning service can save a business money in the long run by helping to extend the life of furniture, flooring, and equipment. These services can also help reduce employee absenteeism, which is often caused by an unkempt workspace. Regular cleaning can reduce germs and bacteria that lead to illness, which in turn leads to more productive employees.
It is important for a commercial cleaning company to be flexible when it comes to scheduling. Some clients want cleaning services done before or after operating hours, while others prefer a specific day and time. Many companies offer a variety of options, so that customers can choose the right schedule for their needs.
When deciding which company to hire, it is important for potential clients to focus on the benefits they will receive from working with the company. For example, if a company has a reputation for providing quality cleaning, it may be able to attract more business by offering references. The customer can then compare the reviews of various companies and make a decision.
Other factors to consider when choosing a commercial cleaning company include the cost, availability, and quality of their work. It is also important to check for certifications and licensing. In addition, it is helpful to find out if the company has any insurance coverage in case of an accident or injury while working on-site.
Reputation
The reputation of a commercial cleaning company depends on how well the services they provide are received by their clients. Whether it’s a large office, shopping center, restaurant, or medical facility, a clean environment is essential for a business to maintain its reputation. Choosing a commercial cleaning service with a good reputation can increase your chances of attracting new customers and growing your business.
When choosing a commercial cleaning service, be sure to ask for references from past and current clients. You can also use the internet to find out what other people are saying about the company. It’s important to choose a cleaning service that has a strong online presence and is reputable in the community.
Using real photos of employees is another way to build trust with potential customers. This allows them to see who they are letting into their home or office, which can make them feel more comfortable with the company. Providing customer feedback on a regular basis is also beneficial. It can help you identify any areas where your company could improve and allow you to address concerns quickly.
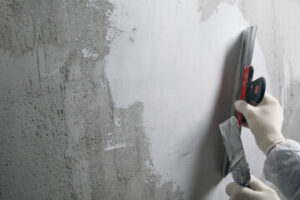
A commercial cleaning service can provide a variety of services, such as dusting, vacuuming, mopping, and sanitizing. They can also clean windows, walls, and floors, and perform maintenance on office equipment. They can also clean restrooms, kitchens, and other common areas. In addition, janitorial services can disinfect medical offices, schools, and warehouses.
While it is important to have a good reputation as a cleaning company, it’s even more important to provide quality work. If your services are not up to par, you may lose customers and damage your reputation. As a result, it’s important to focus on benefits, not features when marketing your cleaning services. For example, you can highlight the fact that your cleaning services can save businesses money on supplies and time.
Moreover, a commercial cleaning service can also improve the cleanliness of a commercial space by removing trash regularly. In addition to this, they can also install air filters and sanitize door handles. This can prevent illnesses and diseases in your employees and customers.
Safety
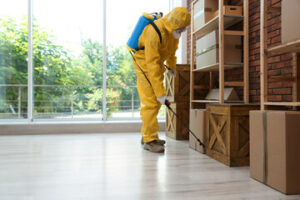
Commercial cleaning services deal with much larger spaces and different types of mess than you might find in a home, and as such they must have adequate safety measures in place. These can include training, use of personal protective equipment (PPE), and regular inspections to identify hazards and risks. Depending on the job, PPE may vary from simple gloves and goggles to respirators and protective clothing.
Commercial cleaners must also be familiar with industry best practices and procedures, especially if they work in industries that require strict standards of hygiene such as healthcare and government buildings. They must have a clear understanding of how to safely store and handle chemicals, and ensure that they are properly trained in how to use the appropriate machinery. They should be aware of the hazards that are specific to their industry and how to avoid them, including chemical burns and slips and falls.
Proper safety measures can also help to minimise cross-contamination. This can happen when harmful bacteria, viruses, or allergens are unintentionally transferred from one area to another while cleaning. By using colour-coded equipment and following proper waste disposal guidelines, commercial cleaners can help to minimise this risk.
In addition to these safety measures, a good cleaning company should be licensed and insured. This provides financial protection during incidents such as employee injuries and client lawsuits. It should also conduct background checks on its employees to prevent the hiring of people with criminal records. It should also carry a janitorial service bond, which protects clients in the event that a cleaner steals items from their property.
Lastly, a good commercial cleaning company will provide a safe and healthy working environment for its employees. A clean and tidy workplace can boost morale and motivation, which can lead to improved productivity. This is particularly important for businesses that rely on a large number of employees, such as retail or manufacturing.
A professional janitorial service should also offer flexible scheduling options to suit the needs of its customers. This can be convenient for busy business owners who want to ensure that their premises are cleaned after hours or on weekends. In addition, it can be cost-effective compared to hiring an in-house team.